Showing posts with label recipe testing. Show all posts

Tuesday, July 16, 2013

Texas Blueberry Cobbler

I'm trusting Cook's Country on the Texas part, as I've only visited once and didn't eat anything exciting. It's really a casual blueberry cake.

There's a heat wave in Maryland, so I'm baking this late at night. If it's good enough, the family won't even know about it.

I preheated the oven to 350 Fahrenheit.

I'm using a glass 9 by 13 dish, but cautiously. Consumer Reports has stated that modern Pyrex is a lot less safe than the old stuff. Pyrex used to make borosilicate glass, which is very tough. Not anymore :-) It can break after setting it down on a counter or stove, so I'm taking the recipe's advice an setting it on a wire rack at all times.

I put 4 tablespoons butter in the Pan of Exploding Glass, and put it in the oven to melt.
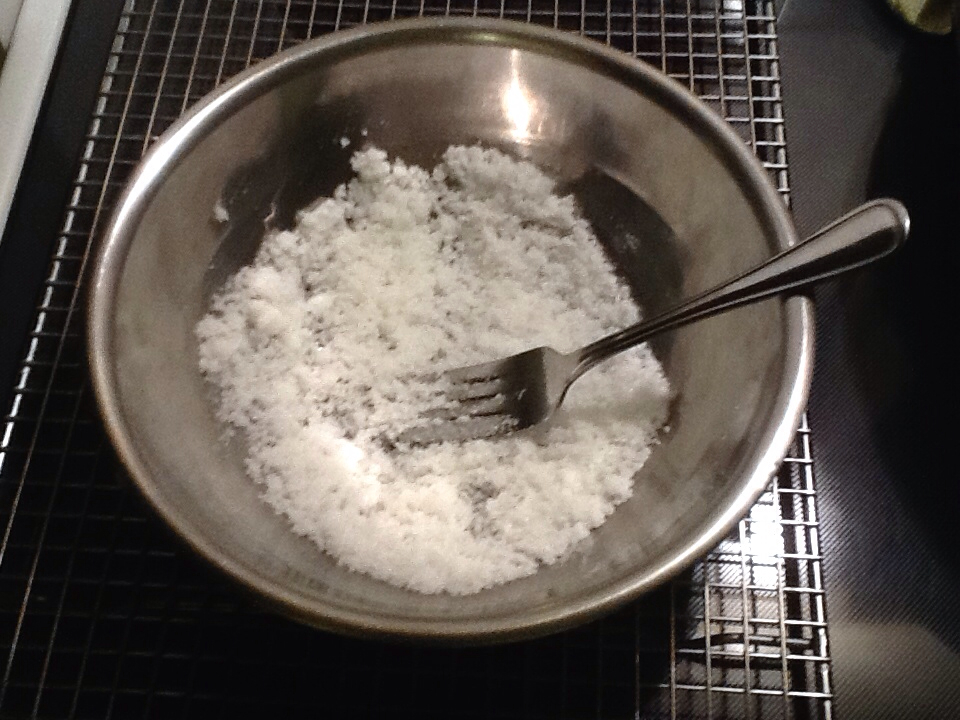
The recipe called for mixing ¼ cup sugar with lemon zest which I don't have. I do have lemon oil and lemon extract, and I decide to use the extract.

I add 1 tablespoon lemon sugar to 3 cups blueberries, and mash them coarsely. I'm not sure I could mash them any other way, but coarsely is what's called for here.

In a bowl, I mixed 7½ ounces all-purpose flour (1½ cups), 1¼ cups sugar, 2½ teaspoons baking powder, and ¾ teaspoon table salt. I then whisked in 8 tablespoons melted butter and 1½ cups milk. A cake without a mixer! At least I won't wake anyone up.

I removed the pan and butter from the oven and put it on my cooling rack. I poured in the batter, and dolloped over the blueberries.

The cake looked a little sad, so I gave it a swirl with a butter knife, like I was marbling a topping. I made zigzags one direction, the more zigzags perpindicular to the first set.

I sprinkled the lemon sugar over the cake, and gingerly put it in the oven.

45 minutes later, I'm not sure what happened to my pretty swirling. It looks good though, and I am saddened by the 30 minute cooling time.

Thirty-five minutes later, I am very full, and very happy. My new favorite fruit dessert!

Update: the very next day, I re-made the recipe, marbling the batter less.

It turned out MUCH more attractive and just as delicious.


Saturday, April 27, 2013

The Perfect Omelet

I haven't made many cakes since my mother got sick, but I made some eggs this morning. I wanted to make "The Perfect Omelet," according to Cooks Illustrated. I have modified the ingredients and procedure a bit.

I started by dicing one tablespoon butter and sticking it in the freezer.

I preheated an 8" nonstick pan on low heat for 10 minutes, setting the timer, with 1 teaspoon vegetable oil.

My pots and nonstick pans are from Ikea and, conveniently, the lid from my saucepan

fits perfectly on my 8" frying pan. You do need a lid for this recipe, so find it now and set it aside.

Break 2 large eggs and 1 yolk into a small bowl, and add a pinch of kosher salt and a little pepper.

I use a plastic storage container as a "garbage bowl" for the egg shells and whites. After having had some coolie dough ruined by bad egg whites, I no longer store egg white or yolks for later recipes, so the egg white goes in there too.

My kids eat sliced mild cheddar cheese (rather than American processed cheese), so that's what I have on hand.

I sliced my cheese slice; this is what we do whenever we need a little grated cheese. The original recipe called for Gruyere, which would be yummy, but I think almost any cheese would work.

In the signature fussiness of ATK, I pierced the yolks with a fork and beat the eggs with the fork for 80 strokes, then mixed in one half of the frozen butter.

When the pan had preheated, I wiped out the oil and added one half tablespoon non-frozen butter, and let it melt and the bubbles subside. The bubbles are water, and you want the water evaporated so the butter can get hot. The white foam is milk solids, which will not go away, but eventually brown and burn.

I put the eggs in the pan and turn the heat to medium-high. The recipe calls for chopsticks, which I don't have, so I used the handle of a wooden spoon to stir the eggs in the video above. I use sort of a planetary spiral of circles, which is easier to demonstrate than explain. I stop when I start to get larger clumps of eggs.

This is where the video stops, because I need both hands here :-)

I smooth out the eggs with a silicon spatula and then sprinkle on one half of the cheese. I then put on the lid and let the eggs sit, off heat, for a timed 2 minutes. Then return the pan to low heat for 30 seconds to finish cooking.

The eggs here are a little soft for me, so I stirred the top a little and cooked another 30 seconds on low heat with the lid on.

The first omelet folded, but the second rolled. It was definitely the best omelet I've made, and the procedure gets faster and easier.

Perfect Omelet

Modified from Cooks Illustrated, January 2009

Serves 2

4 large eggs and 2 large yolks

1/2 teaspoon oil

Salt and pepper

2 tablespoons butter, divided

1 tablespoon cheese, grated, optional

Dice and freeze 1 tablespoon of the butter. Cut the other tablespoon in half, and let it rest on the counter. Preheat an 8" nonstick pan and oil for 10 minutes over low heat. Get handy a lid for the pan, a wooden spoon, a silicon spatula, 2 plates, a paper towel, and the cheese.

While pan is heating, put 2 eggs and one yolk in a small bowl and season. Break yolks with a fork, and beat for 80 strokes.

When the pan is hot, wipe it out and put it 1/2 tablespoon of room temperature butter. Add 1/2 tablespoon frozen, diced butter to the beaten eggs.

When the butter is hot, add the eggs and stir gently with the handle of the wooden spoon. When you see the first large curd, remove pan from heat, smooth eggs with the silicon spatula, sprinkle with cheese, and let rest, covered, for 2 minutes.

Put pan back over low heat, covered, and heat 30 seconds or until done to your taste. Loosen edges with spatula, then transfer omelet to plate, folding or rolling as desired.

Monday, February 25, 2013

Banana Cake with Chocolate Peanut Butter Ganache

I've wanted to make a chocolate peanut butter cake for a while, but I've only seen a few peanut butter mousse recipes. In Rose's Heavenly Cakes by Rose Levy Berenbaum, she has a recipe for chocolate peanut butter ganache. During my water yoga class, I had a flash of inspiration: bananas, peanut butter, and chocolate.

I've made one Momofuku Milk Bar inspired cake before: the Pumpkin Pie Cake. I was scared of cutting out layers from a sheet cake, so I make them in regular cake pans. I also was a little concerned about the declared difficulty of Christina Tosi's cake recipes.

Shannon of A Periodic Table to the rescue! She did a fabulous tutorial for the Apple Pie Layer Cake, and I felt much more confident after reading it.

I made the banana cake from Milk Bar. The recipe warns of a difficult emulsion (most batters are emulsions, which is why you add ingredients to them slowly and in a specific order), but it came together fine. If you are new to Milk Bar, I would suggest making the Corn Cookies or Compost Cookies first, as those recipies will help acquaint you with Christina Tosi's techniques.

Tosi pairs her banana cake with gianduja, an Italian chocolate hazelnut candy, or upscale Nutella. I went decidedly more American with a Chocolate Peanut Butter Ganache and a cut up Heath Bar.

I still don't have the 6-inch cake rings, so I assembled the cake in a 6 by 2-inch round cake pan. I reused the acetate collars given to me by the Wegman's bakery.

I was a little worried about removing the cake from a pan without a removable bottom. I let the cake set up in the freezer for about 20 minutes; the ganache completely hardened and the cake tipped out without any difficulty.

I'm enjoying this method of layering cakes and fillings, and my family enjoys eating the cakes. I see lots more in my future!

Wednesday, December 5, 2012

Cornflake Chocolate Chip Marshmallow Cookies

Not many pictures, as time was tight. These are from the Momofuku Milk Bar cookbook. I did not adapt these enough that I feel comfortable posting a recipe.

They are very, very good—slightly salty, and crunchy and gooey at the same time. I normally don't even like marshmallows, but the minis are perfect here. Christina Tosi lists a version with Fruity Pebbles instead of Corn Flakes and without chocolate chips. I didn't grow up eating "sugar cereal," and that still sounds amazing.

Yes, I have a crush on Milk Bar, but it's not blind. I have tested three cookie recipes in the past two weeks, several from Milk Bar, and I have thrown away three batches of cookie dough. It was painful. They were not nice enough to give, and I had to ask myself my standard "do I want this [food I am looking at] in the garbage or on my butt?" Crude, but it works.

The winners completely redeem the book though.

This was my second take on the recipe, and I felt confident enough to double it.

Really strange-looking cookie dough
This was not a good idea, as it didn't come close to fitting in my 5 quart KitchenAid.

I also made the cookies a lot smaller, using a flat scoop from a #40 or tablespoon disher. This is equivalent to a cookie scooped by a dinner-tablespoon. I baked them for only 8 minutes at 375 degrees.

Why did I throw away the first batch? Warning, dorkinesss ahead!

First, I used the Christmas variation that mixed in crushed candy canes, and did not like it. I didn't think I would, but I thought it was worth trying.

Second, I used the wrong flour. My miserly tendances led me to use bleached all-purpose flour. Christina Tosi calls for King Arthur unbleached bread flour, and I was unwise to ignore this.

As I read in BakeWise, cookies are controlled by their very low moisture level. The moisture level is, in turn, influenced by the protein level of the flour. King Arthur Flour has very high protein levels in their flours in general. For example, the protein level in their AP flour is 11.7%, higher than almost every other brand (Cook's Illustrated and TheArtisan.net). KAF bread flour is 12.7% protein.

Cookies from my first batch resembled terrible fried eggs, bulging in the middle with a huge spread and very thin, tough margin. I didn't have any bread flour (sigh—I usually have six types of flour on hand), so I used the very strong (high in protein) King Arthur AP flour instead of the softer bleached flour. The new cookies were still pretty flat, but good enough to share.

Bleached all-purpose flour is almost always softer (lower in protein) than unbleached all-purpose flour. According to Bakewise, this is only because of convention and not because of the bleaching.

Sunday, November 18, 2012

Milk Crumb

I had some credit at Amazon, so I actually bought Momofuku Milk Bar, which was quite expensive for this church mouse. But I'll say it again—Christina Tosi is a genius, and I have, as they say, drank the Milk Bar Kool-Ade.

The Milk Bar recipes are very complex if you work on one recipe, start to finish. Restaurants work on a component system where finished dishes are made from one or more pre-made component recipes. Tosi takes this even further, designating ten "mother recipes" akin the the French mother recipes of sauces.

One of the mother recipes is Milk Crumb. Milk Crumb tastes as Tosi thinks milk should taste. I'm one of the few adults I know who still drinks milk often, and I think Milk Crumbs are more like milkshake in taste, though not so heavy. They are primarily for including in other recipes, but yummy to munch on their own. Everyone who tried them liked them.

I started by preheating the oven to 250 degrees, and whisked the dry ingredients: dried milk, flour, cornstarch, sugar, and salt.

Next I mixed in melted butter.

Then I spread it on a lined sheet pan and baked 20 minutes.

The next step is to melt white chocolate to mix in. I used Ghirardelli real white chocolate. You can see what happened—real white chocolate is very finicky stuff, and this burned under the surface when I was melting it.

I switched to Candy Melts, which melt very easily.


Tosi uses Vahrona white chocolate, and it might be less viscous when melted than the Candy Melts. I had to use twice the amount in the recipe to get it to mix in smoothly. I broke up the crumbs as they cooled, and eventually ended up with little crunchies.

Tosi uses Crumbs for garnish, for texture in cookies, and between cake layers. I'm planning to use these in some blueberry cookies after Thanksgiving. I'm looking forward to Chocolate Crumbs and Pie Crumbs.


Saturday, October 13, 2012

Corn Cookies

I take back anything the slightest bit catty I might have said about Momofuku Milk Bar. Christina Tosi is a genius, and her corn cookies are amazing.

My kids asked for cookies and I was out of chocolate chips (gasp!). The corn cookies from Milk Bar have interested me for a while; I made them but warned my husband that he might not like them (he's conservative about flavors).

The recipe is posted in full at The Kitchn. I try not to post recipes that aren't my own, so I'll just refer you to the article for specifics.

The first step, as for a lot of baking, is to set the butter on the counter to soften. In this recipe, you use 2 sticks of unsalted butter.

I weighed 65 grams freeze dried corn into my food processor,

then processed it until fine. My freeze-dried corn is from Thrive, a great product, but mail-order only. A similar product from Just Tomatoes, conventional and organic, is available in many natural food stores.

A scale that can measure in grams is VERY helpful for these recipes, thought Christina Tosi does give volume equivalents.

I mixed 300 grams sugar and the two sticks butter on medium-high for 3 minutes. Christian Tosi takes creaming very seriously, so I followed her times.

I then added 1 egg and mixed on medium-high a full 8 minutes.

While the mixer was running I measured and whisked together the dry ingredients: 225 grams flour, 45 grams corn flour, ¾ teaspoon baking powder, ¼ teaspoon baking soda, and 1½ teaspoons kosher salt.

I used Maseca instant masa or corn flour. I included the affiliate link only for the picture—it's available very cheaply at almost any North American supermarket. As an aside, I use Maseca to make very easy corn tortillas for tacos; the ATK blog has a great tutorial.

After the 8 minutes of creaming, I mixed in the dry ingredients for just a minute on the lowest speed. Isn't that the most beautiful cookie dough?

The original recipe makes 13 cookies with ⅓ cup dough each. Considering that ¼ dough makes huge cookie-shop-at-the-mall-sized cookies, ⅓ seems large for home baking. I used my fabulous #40 (tablespoon) cookie scoop from King Arthur Flour, and got approximately 3 dozen nicely-sized cookies. I refrigerated them, covered, for 1 hour.

After the dough was cooled, I preheated the oven to 350. I arranged 12 cookies on a lined sheet and smooshed them with a glass measuring cup.

As I changed the cookie size, I watched them carefully in the oven. At 12 minutes the edges were just starting to brown. I was able to transfer them to a cooling rack immediately, losing only one to carelessness and fragility.

Everyone loved these cookies. My husband said "I thought you were going to make cookies I wouldn't like," and stated that they tasted like regular sugar cookies to him. Also, he said that they look healthy but don't taste healthy. The extended creaming really contributes to the texture.

My only caveat is that the cookies are a little salty; I probably will cut back on the salt by one third the next time I make these—and I will make them again.