Showing posts with label recipe. Show all posts

Saturday, April 27, 2013

The Perfect Omelet

I haven't made many cakes since my mother got sick, but I made some eggs this morning. I wanted to make "The Perfect Omelet," according to Cooks Illustrated. I have modified the ingredients and procedure a bit.

I started by dicing one tablespoon butter and sticking it in the freezer.

I preheated an 8" nonstick pan on low heat for 10 minutes, setting the timer, with 1 teaspoon vegetable oil.

My pots and nonstick pans are from Ikea and, conveniently, the lid from my saucepan

fits perfectly on my 8" frying pan. You do need a lid for this recipe, so find it now and set it aside.

Break 2 large eggs and 1 yolk into a small bowl, and add a pinch of kosher salt and a little pepper.

I use a plastic storage container as a "garbage bowl" for the egg shells and whites. After having had some coolie dough ruined by bad egg whites, I no longer store egg white or yolks for later recipes, so the egg white goes in there too.

My kids eat sliced mild cheddar cheese (rather than American processed cheese), so that's what I have on hand.

I sliced my cheese slice; this is what we do whenever we need a little grated cheese. The original recipe called for Gruyere, which would be yummy, but I think almost any cheese would work.

In the signature fussiness of ATK, I pierced the yolks with a fork and beat the eggs with the fork for 80 strokes, then mixed in one half of the frozen butter.

When the pan had preheated, I wiped out the oil and added one half tablespoon non-frozen butter, and let it melt and the bubbles subside. The bubbles are water, and you want the water evaporated so the butter can get hot. The white foam is milk solids, which will not go away, but eventually brown and burn.

I put the eggs in the pan and turn the heat to medium-high. The recipe calls for chopsticks, which I don't have, so I used the handle of a wooden spoon to stir the eggs in the video above. I use sort of a planetary spiral of circles, which is easier to demonstrate than explain. I stop when I start to get larger clumps of eggs.

This is where the video stops, because I need both hands here :-)

I smooth out the eggs with a silicon spatula and then sprinkle on one half of the cheese. I then put on the lid and let the eggs sit, off heat, for a timed 2 minutes. Then return the pan to low heat for 30 seconds to finish cooking.

The eggs here are a little soft for me, so I stirred the top a little and cooked another 30 seconds on low heat with the lid on.

The first omelet folded, but the second rolled. It was definitely the best omelet I've made, and the procedure gets faster and easier.

Perfect Omelet

Modified from Cooks Illustrated, January 2009

Serves 2

4 large eggs and 2 large yolks

1/2 teaspoon oil

Salt and pepper

2 tablespoons butter, divided

1 tablespoon cheese, grated, optional

Dice and freeze 1 tablespoon of the butter. Cut the other tablespoon in half, and let it rest on the counter. Preheat an 8" nonstick pan and oil for 10 minutes over low heat. Get handy a lid for the pan, a wooden spoon, a silicon spatula, 2 plates, a paper towel, and the cheese.

While pan is heating, put 2 eggs and one yolk in a small bowl and season. Break yolks with a fork, and beat for 80 strokes.

When the pan is hot, wipe it out and put it 1/2 tablespoon of room temperature butter. Add 1/2 tablespoon frozen, diced butter to the beaten eggs.

When the butter is hot, add the eggs and stir gently with the handle of the wooden spoon. When you see the first large curd, remove pan from heat, smooth eggs with the silicon spatula, sprinkle with cheese, and let rest, covered, for 2 minutes.

Put pan back over low heat, covered, and heat 30 seconds or until done to your taste. Loosen edges with spatula, then transfer omelet to plate, folding or rolling as desired.

Saturday, March 16, 2013

Irish Oatmeal in the Slow Cooker

This is a favorite recipe I've modified from the very, very good book Slow Cooker Revolution (affiliate link). I've adjusted the seasoning and sweetness to my taste, so feel free to do the same for yourself. I start the oats late in the evening, before bed, or prepare the dry ingredients ahead in batches and freeze.

I started by melting 2 tablespoons butter in a 12-inch skillet; I used my Lodge cast iron skillet. When I'm preparing multiple batches, I use a 7-quart Dutch oven.

I measured 2 cups steel-cut oats. They are cheapest in the bulk section if a health food store, but you can even buy them in Walmart now. The fanciest ones are imported from Ireland. "Old-Fashioned" rolled oats are steamed and rolled flat; steel cut oats are sliced (by steel blades) rather than being flattened. They have more flavor and fiber than the rolled oats, but take longer to cook. Un-violated oats are called oat groats, and the intact grain is very slow to cook.

I toast the oats in the butter until medium brown. Toasting is optional, but I never skip it; If I'm going to make "real" oatmeal, I might as well go all the way. I tried very hard to capture the color above, but I'm not the best photographer. You're going for slightly darker color on average, with none if the oats reaching the dark-brown burned state, which would flavor the whole batch.

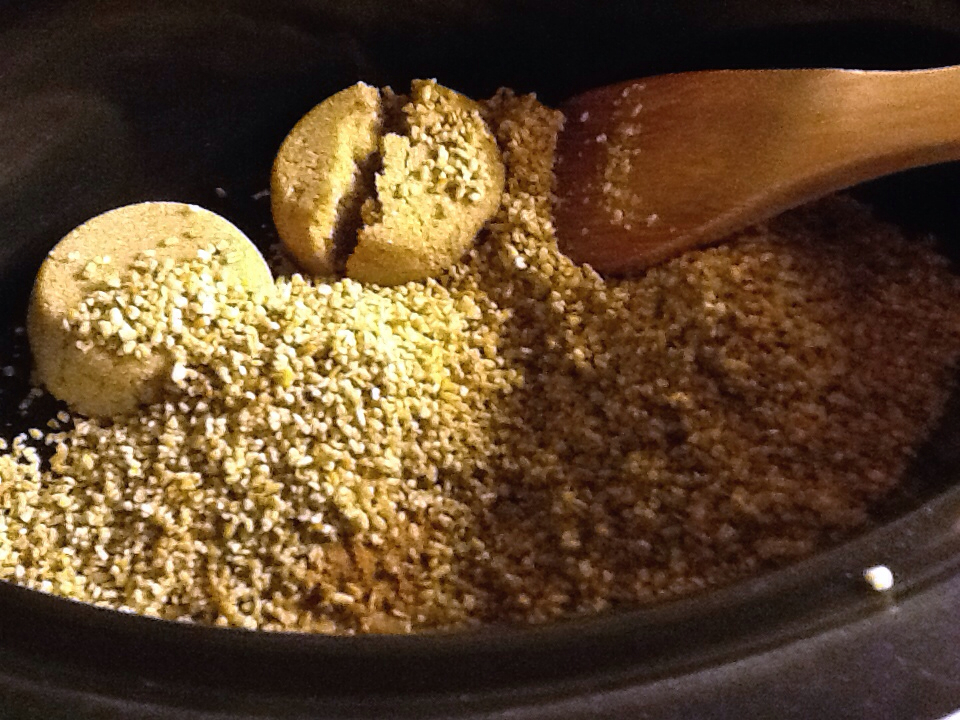
I add the toasted oats to my large slow cooker, along with 1 teaspoon salt, 1 teaspoon cinnamon, and 3/4 cup light brown sugar. These amounts are all adjustable to your taste. I've added raisins, but the long cooking time makes them a little prune-y.

Next I add 8 cups water, or 1/2 gallon. Conveniently, I have a 1/2 gallon water pitcher from the Dollar Store.

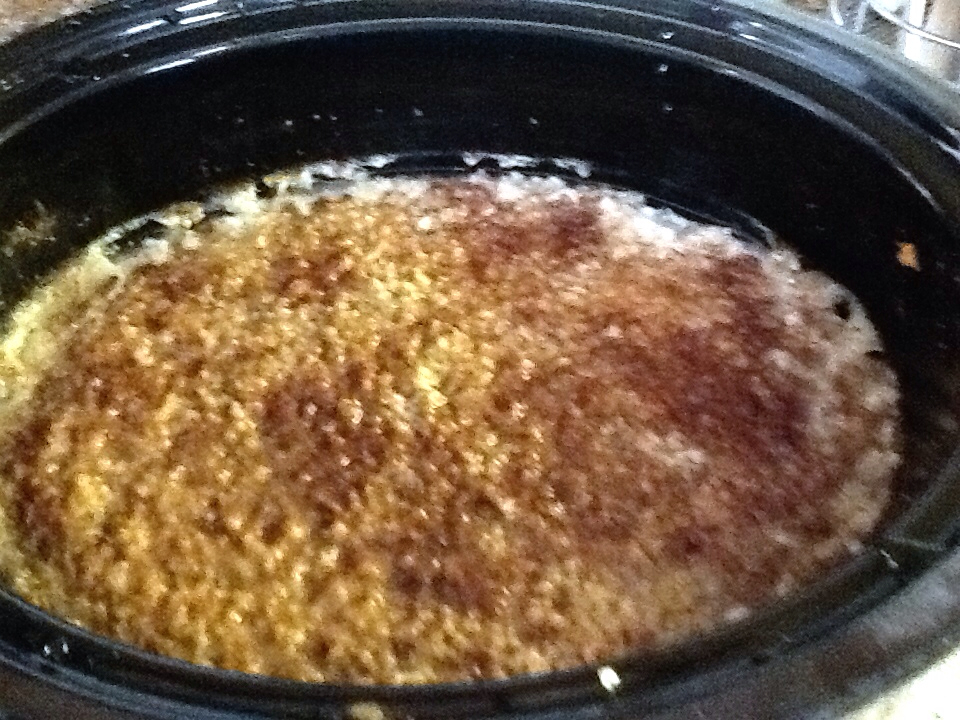
Things do not look delicious at this point :-) I went to bed.

The ideal cooking time is 4-6 hours on low. This works for us because my husband gets up earlier in the morning than I do. It's not really a problem if the oats go a bit longer though.

In the morning, the oatmeal looks like this.

It's less exciting but more homogeneous after being stirred.

My husband and I eat a filling portion with milk, then he (wonderful man) refrigerates the rest in 1-serving portions.

On a personal note, I will be posting less frequently for a while. My mother is very ill, and I'm spending a lot of time with her.

Irish Oatmeal in a Slow Cooker

Adapted from Slow Cooker Revolution from America's Test Kitchen

Serves 8

2 tbsp butter

2 cups steel-cut oats

1 tsp salt

1 tsp cinnamon

3/4 cup light brown sugar

8 cups water

Melt butter in 12-inch skillet over medium heat. Add oats and toast, stirring very often, until browned around the edges. Transfer to a 2-quart slow cooker.

Add salt, cinnamon, sugar, and water to slow cooker and cook on low 4-6 hours. Stir and serve with milk.

To prepare ahead, toast oats and transfer to a quart-sized freezer bag. Add salt, cinnamon, and light brown sugar. Freeze. The night before you want to eat the oatmeal, transfer the contents of the bag to the slow cooker, add water, and cook as above. You may easily prepare-ahead several batches of oatmeal in this manner, then freeze in individual bags for later cooking.

Sunday, January 13, 2013

Fudge Frosting

This is a new, original chocolate frosting recipe I am very happy with. I made it by accident when I ran out of powdered sugar, but I liked it so much that I used it on my own birthday cake.

The flavor comes from cocoa. I used mostly the Scharffen Berger Natural, topped off with some Hershey Special Dark. Good cocoa is expensive!

I wanted the same yield as my American Buttercream recipe, but with a different ratio of ingredients.

I started by creaming 12 ounces or 3 sticks of very soft salted butter. I then added an equal weight of shortening and mixed them together. You can see that, by creaming the butter first, I have eliminated the butter lumps I previously struggled with. I also here mixed in 1 teaspoon vanilla extract.

I next measured and sifted 6½ ounces of cocoa. I measure directly into my "sifter." Cocoa is so fatty that it has lumps if I don't sift it.

I mixed 1½ pounds powdered sugar and the cocoa into the butter, a little at a time. When the sugar was almost all in, I mixed in 2 tablespoons meringue powder, which is optional. Finally I added about 2 tablespoons milk to smooth it out.

The final frosting is a lot softer than the American Buttercream. Most significantly, it doesn't crust, so you can use the Viva trick to get it very smooth. I really prefer the flavor.

I'm using a Chocolate Sour Cream Cake, baked in three layers.

I'm going to demonstrate how I use the icer tip. Warning: this is my first video.

I'm using a 16" reusable Wilton Bad with the end cut to fit the icer tip.

After the bag is filled, I twist the end closed, like a bread bag,

Then I tuck the end under, where its secured in my hand.

I pipe with my right hand, while spinning the turntable with my left. This makes icing application much easier.

Moving right along, this is what happens when you don't level the tops of your cakes. I use the wedge shape of the icer bag to fill in the gaps, then frost the sides.

The frosted cake.

The final birthday cake, after my son helps me with the sprinkles.

It was wonderful, but a little overwhelming, with the chocolate, butter, and sugar, which is what I wanted :-) I gave the leftovers to the local Missionaries already, which makes me a little sad.

Chocolate Fudge Frosting

Makes enough frosting for a 9" 3-layer cake.

12 ounces or 3 sticks salted butter

11 ounces or 1½ cups vegetable shortening

1 tsp vanilla extract

1½ lbs or 5 cups unsifted confectioners' sugar

6½ ounces or 2½ cups good cocoa, natural or Dutch processed, sifted after measuring

2 tbsp meringue powder, optional

2-4 tbsp milk, cream, or water

Beat butter in mixer until smooth. Beat in shortening, then the vanilla extract.

Add powdered sugar, a cup at a time, then the cocoa, while the mixer is on low. Mix in the meringue powder.

Add enough milk to smooth out the frosting. Add less for a stiff consistancy frosting, more for soft.


Thursday, October 11, 2012

Apple Crumble

Frederick, Maryland has several orchards and we get great apples. I asked for a recommendation for baking at the Farmers Market and bought a half bushel of 2nd Jonagolds. I'm not up on my old measurements, but a half bushel is a LOT of apples. I just can't resist 2nd produce, which is produce too ripe or unattractive to sell at full price. You usually can't pick your amounts though.

I made one of my favorite desserts, apple crumble. The crumble I like is very specific and not very common. I had it in England when I was a kid, and I'm pretty sure it came from a box. It's very sweet and has no oats or nuts. I like both, but not in my crumble, which is about sweetened baked apples and nothing else.

It is also the least specific and detail-oriented recipe I make, which is great for people who otherwise might be timid at the thought of baking.

I got the recipe in the late 1990s from SOAR, the Searchable Online Archive of Recipes, one of the best recipe collections on the early-ish Internet.

My sweetie peeled the apples for me, the hardest part of the whole thing. You can leave them on of course.

The he put them through my fab apple slicer from Willliams Sonoma. It was a recommendation from Cook's Illustrated, and works very well. I'll buy a $20 gadget if it helps me and the kids eat more fruit. These were really good apples—both of my kids and I ate slices before they went in the oven.

I measured 1 cup all-purpose flour, ½ cup white sugar, 1 cup brown sugar, 1 stick salted butter, and ½ teaspoon cinnamon into my food processor.

I then processed it until the butter was in small pieces.

I put all the apples in a 9 by 13-inch Pyrex baking dish, then dumped the crumble on top. I would have mixed it in a little if the dish wasn't so full.

Finally, I baked the apples for 1 hour at 350. We ate the apples as soon as they wouldn't scald us outright.

Personally, I eat apple crumble in a bowl with cold milk like cereal. Cream or vanilla ice cream would be great too.

The imprecision comes from the amount of apples. I use any amount of apples I have, in whatever dish they fit in. I make the same amount of crumble each time, but only use as much as seems appropriate. The mixture freezes very well in a zipper plastic bag. I bake until the apples are soft, and raise the temperature if I don't have a lot of time. It's just apples and sugar, so it's hard to screw it up.

I can't wait until the next time I go to the Farmers Market!

Apple Crumble

Serves 8, scales well

½ bushel apples (a lot), cored, peeled if you wish, and in slices or chunks

1/2 cup sugar

1/2 teaspoon cinnamon

1 cup flour

1 cup brown sugar

8 tablespoons butter

Directions:

Preheat oven to 350 degrees.

Combine ingredients until mixture has a crumb-like texture. You can use a mixer, food processor, dough blender, or your hands.

Put apples into a baking dish. Top with crumb mixture.

Bake uncovered approximately 1 hour until tender. Cool slightly before eating.


Thursday, September 20, 2012

Damp Yellow Cake

This is the cake that won me a blue ribbon at the Frederik Fair!

It is based on Shirley Corriher's Magnificent Moist Golden Cake from BakeWise. That cake is designed to fill a 9 by 2-inch round pan, but each time I made it, the pan overflowed. I divided the batter into two pans, but I felt the cake wasn't tall enough, so I scaled the recipe 150% and baked it in three 9-inch pans. The fair only allowed two layers, so I baked the scaled recipe in two 9-inch pans, and it still worked.

I've included the weights and baking times for both two and three layers.

I started by preheating the oven to 350 degrees, spraying the pans with oil and flour spray, and lining them with parchment. The parchment is optional , but makes it easier to get the cakes out of the pan.

I measured 2¼ cups or 15¾ ounces into a mixing bowl. This cake can be made in a mixer or by hand. I boiled water in the microwave, and measured ½ cup water onto the sugar.

I stirred on low speed. There's too much sugar to dissolve completely, but stirring gets the crystals evenly wet.

Next I added 6 tablespoons softened unsalted butter cut into chunks, 1 tablespoon vanilla extract, ¾ teaspoon salt, and ½ cup vegetable oil.

I mixed on low speed again, but just to break up the butter.

In a separate bowl, I measured 10½ ounces cake flour, which is 2⅓ cups if you spoon the flour into the cup and then level it, and 2½ teaspoons baking powder, and whisked to combine them.

I added the flour mixture to the batter in thirds, mixing after each addition. You shouldn't add the flour all at once because you're creating a suspension of flour and water. Larger clumps of flour oils need more mixing to become suspended, and more mixing agitates the proteins in the flour and toughens the cake. (Please note that this is just a hypothesis.)

Now I add 4 egg yolks and 3 eggs, one at a time. The egg yolks contain lecithin, which emulsifies and stabilize the batter; going slowly helps here also.

Finally I fold in ¾ cup heavy cream which I've whipped in a separate bowl. I use an manual egg beater to whip the cream.

This isn't as delicate as a soufflé, so keep folding until you don't see streaks.

Next you portion the batter. The batter weighs 3 pounds total, so you want 1 pound of batter in each of three pans, or 1½ pounds batter in each of two pans. It is easiest to evenly portion the batter using a scale, but you can approximate pretty well without one.

I bake all the pans at the same time. My oven has hot spots, so I should have rotated the position and location of pans. In other words, spin the pans around and shuffle them into another part of the oven.

This is an unusual batter. Most cakes and muffins I can test for doneness by touching the top. That doesn't work for this cake. The best way to check if they're done is to jiggle the pans; the cake is done once the batter is set and moves very little.

In my oven, the thinner cakes were done at 23 minutes, and the thicker at 27 minutes. As every oven is different, you should check on the pans at 18 minutes for the thinner cakes and 23 minutes for the thicker cakes.

Cool 10 minutes in the pans on the rack, then turn out to finish cooling completely.

Damp Yellow Cake

Serves 10-18

Ingredients:

  • 10 1/2 ounces cake flour or 2⅓ cups measured by spooning and leveling
  • 2 1/2 tsp baking powder
  • 15 3/4 ounces sugar or 2¼ cups
  • 1/2 cup water
  • 6 tbsp unsalted butter cut in 1 tbsp pieces
  • 1 tbsp pure vanilla extract
  • 3/4 tsp salt
  • 1/2 cups vegetable oil
  • 4 large egg yolks
  • 3 large eggs
  • 3/4 cup heavy cream

Directions:

Preheat oven to 350 degrees F. Spray two or three 9 by 2-inch round pans with flour-added baking spray and line bottoms with rounds of parchment.

Thoroughly mix flour and baking powder in a bowl and set side.

In a small bowl, whip the cream just beyond soft peaks.

Put the sugar in the mixer bowl. Heat the water to in the microwave. Add it to the sugar and stir a few seconds to dissolve the sugar, then add the butter, vanilla, oil, and salt, and mix on medium to blend. Sprinkle about 1/3 of the flour mixture over the sugar mixture. Mix on lowest speed until incorporated. Continue adding the flour until all is incorporated. Then stir in the egg yolks one at a time, and then stir in the whole eggs one at a time.

Fold a little of the whipped cream into the batter to lighten, then fold in the rest.

Pour the batter into pans: 1 lb 8 ounces ounces batter in two pans or 1 lb batter in three pans. Drop the pans onto the counter a few times to get out any bubbles. Bake for about 23-27 minutes, or until cake no longer jiggles.

Cool completely on wire racks.