My mother's birthday was last week. She is on a very restrictive diet–no gluten and no sugar or artificial sweeteners. The only sweetener she can have is stevia. Sugar is very chemically important to cakes, so I knew I couldn't make a traditional cake. But a cheesecake is just a custard, and custards can be made without sugar, so that's what I made.
This also was a last minute cake. I knew when my mother's birthday was, of course, but I didn't know that my brother from out of town would be having a dinner for her the day before her birthday. I didn't have time to make a traditional cheesecake, so I adapted the No-Bake Cheesecake Tart from ATK's
The Quick Recipe that claims to take one hour start to finish.
It is due to my own inattention that I don't have a picture of the cheesecake unmolded. Oops.
The recipe calls for a tart pan with a removable bottom, but I just used my
cake pan with a removable bottom. A springform or plain pie plate would also work if that's what you have.
I was a little sloppy making the graham cracker crust. I bought gluten-free graham cracker crumbs, but didn't realize until too late that they had a little sugar. If the person you are preparing this for can't have even small amounts of sugar, I would make a crust with something like cereal crumbs, which i would prepare the same.
Erewhon Crispy Brown Rice Cereal is certified GF and has no cane sweeteners and <1 gram sugar per cup.
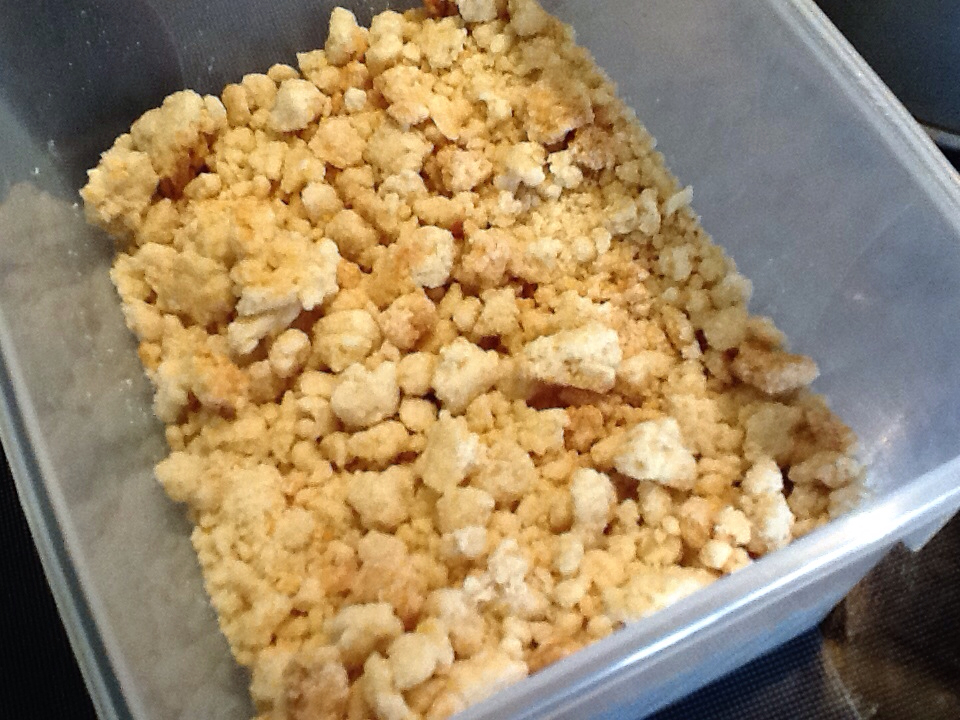
For the crust I simply combined 1 cup gluten-free graham cracker crumbs and 4 tablespoons melted butter. I then lined my pan with a parchment circle, trimmed to size, and pressed the crumbs to cover the bottom.
I baked the crust for 10 minutes at 350 degrees, then let it cool. If I was making the tart without the restrictions, I would add 1 tablespoon sugar to add structure.
I started by measuring out 1/2 cup heavy cream and 1 1/2 teaspoons plain gelatin in a Pyrex cup. I transferred 1/4 cup of the cream to a small mixing bowl and sprinkled the gelatin over the remaining cream, stirred it, and let it sit 5 minutes to "soften" which I'm guessing means hydrate. I finally microwaved the gelatin and cream for 40 seconds, until it was bubbly, to dissolve it.
The other 1/4 cup cream I whipped with my egg beater (my husband helped). As I've mentioned before, my 6 quart KitchenAid cannot whip very small amounts. I think he got a little carried away; I wouldn't have whipped the cream quite so much. You've gotta love the enthusiasm though!
I softened 8 ounces cream cheese in my mixer by beating the heck out of it. Then I tried to fold in the whipped cream by hand, but I don't know if I was at all successful at keeping any bubbles. so I went back to beating the cream in with the mixer. Once the cold cream was incorporated, I beat in the warm cream with the dissolved/melted gelatin.
Now for the flavoring. I beat in 1 tablespoon lemon juice. I was using
Stevia in the Raw in packets, so I added 8 packets to the bowl and mixed them in. I did, and you should, go by taste here. Stevia is very sweet and the sweetness lingers, so I tried to maintain some tartness.
I definitely had cheesecake filling now, but it seemed a little plain. If I'd had time to shop, I would have made the cheesecake plain and topped it with some very nice raspberries. Working from my pantry, I decided to go with
freeze-dried raspberries from Just Tomatoes.
I've recently read
Momofuku Milk Bar, and in that Christina Tosi uses powder made from freeze-dried corn in her corn cookies. So I pulverized 1 cup of freeze dried berries into powder, then mixed it with 1/2 cup of cheesecake filling.
I transferred the plain batter to the pan, then tried to pipe stripes of the raspberry. It didn't go very well. The filling was very thick, and the puréed raspberries were not uniform enough to go through my tip. Next time, I will use a very large plain tip.
Trying to rescue my dessert, I used a butter knife to marble the topping. I think it looked OK in te end. I then put the tart in the freezer for 15 minutes to set.
The cookbook also recommends strawberry jam and pumpkin pie filling as swirl-in ideas, which sounds promising.
When unmolded, the tart was very thin, maybe 1 inch tall. My mother loved it and ate it for breakfast and dessert until it was gone.
No-Bake Raspberry Cheesecake Tart, with GF and sugar free options
Adapted from The Quick Recipe
Serves 8, 1 hour total
Crust
1 cup graham cracker crumbs, GF graham cracker crumbs, or Brown Rice Cereal crumbs
4 tablespoons butter, melted
1 tbsp sugar, optional
Filling
1/2 cup heavy cream, divided
1 1/2 tsp plain, unflavored gelatin
8 oz cream cheese
1 tablespoon lemon juice
8 packets Stevia in the Raw, to taste
OR
1/4 cup sugar
1 cup Just Raspberries, pulverized in a blender
OR
1 pint fresh raspberries for topping
Directions
Preheat oven to 350. Combine crumbs, butter, and optional sugar, then press into a pan with a removable bottom or pie plate. Bake 10 minutes, then let cool.
Put 1/4 cup of the cream in a glass bowl, sprinkle over the gelatin, then stir to combine. Let sit 5 minutes, then microwave 40 seconds, until bubbling.
Meanwhile, whip the remaining 1/4 cup cream in a small bowl. In a larger mixing bowl beat the cream cheese to soften. Beat the whipped cream into the cream cheese, then the heated gelatin and cream mixture. Add lemon juice and stevia or sugar.
If using dried berries set aside 1/2 cup filling. In either case, transfer filling to pan.
If using dried berries, mix berries and filling. Either pipe stripes or spoon small blobs of the filling to the pan, then carefully use a butter knife to swirl decoratively.
Freeze 15 minutes to set, then refrigerate until ready to serve. Top with fresh berries, if using, just before serving.




 Posted with Blogsy


